|
Article ID: 650
Last updated: 22 Dec, 2020
Beginner's Guide to Adobe SignThe following link contains information from Adobe about Adobe Sign: https://helpx.adobe.com/sign/tutorials.html This article includes the following content areas:
Send to a Single RecipientThe most commonly used workflow in Adobe Sign: sending a document for signature. In this video, learn how to upload a document, add form fields, and send it to a recipient for signature. This video starts with the New Home page experience. The most commonly used workflow in Adobe Sign: sending a document for signature. In this video, learn how to upload a document, add form fields, and send it to a recipient for signature. This video starts from the Classic Home page experience. Send to Multiple RecipientsLearn how to send a document for e-signature to more than one recipient. This video starts with the New Home page experience. Learn how to send a document for e-signature to more than one recipient. This video starts from the Classic Home page experience. Set Up Routing for Signing OrderRecipient Roles when Sending DocumentsAdobe Sign for business and enterprise service levels have the option to expand the roles for Agreement recipients, beyond just the Signer, to better match their workflow requirements. The current roles that can be enabled are: When enabled, each recipient in an Agreement will have their role individually configurable, with Signer being the default. To enable/disable Role options, login as an Account Administrator and navigate to: Account > Account Settings > Send Settings > Allowed Recipient Roles
SignersSigners are required to apply at least one signature to an Agreement. This role is the default recipient role. Each signer on a transaction needs to have at least one required signature field assigned to them. If the system does not find a signature field for the signer, it automatically generates a signature block at the end of the document. The appearance of a signature block is a good indicator of a signature field not being assigned correctly.
ApproversApprovers are not required to sign or interact with any fields. All approvers need to do is enter their name before sending the transaction to the signers. Fields can be assigned to approvers, and if those fields are required, they need to fill them out. The approver role works well for situations where someone needs to "okay" a document before it's sent off to the signer.
AcceptorAcceptors are mechanically the same as Approvers in that they do not need to apply a signature, but if form fields are assigned to them, they will be available as you would expect. The Acceptor role is appropriate when the Recipient needs to acknowledge an acceptance of the Agreement without formally approving the content.
Certified RecipientCertified Recipients can have no (zero) form fields assigned to them. During their "signature" process, they will be asked to either delegate, decline or acknowledge the agreement.
Form FillerDesigned specifically for customers that have a need to fill in form content during the signature process, but don't have the systems in place to programmatically build custom documents or push field content from a database to the form. Form Fillers can be designated within a signature cycle, but are not required to apply a signature of any kind. All field types can be assigned to a Form Filler, including signature fields if desired.
DelegatorThe delegator role is designed for workflows that require a person to make the final judgment on who the correct next person is that should sign or approve the document. This role does not replace the ad hoc option for a signer/approver to delegate their participation. Rather this role is used when a human check point/routing option is needed in a workflow that has to initiate Agreements without knowing the full recipient list beforehand.
Once the delegator role is selected, you will notice that a second icon/menu is available. This second-level menu allows you to choose what role the delegated party should be. The signer is the default. You cannot delegate to a delegator role.
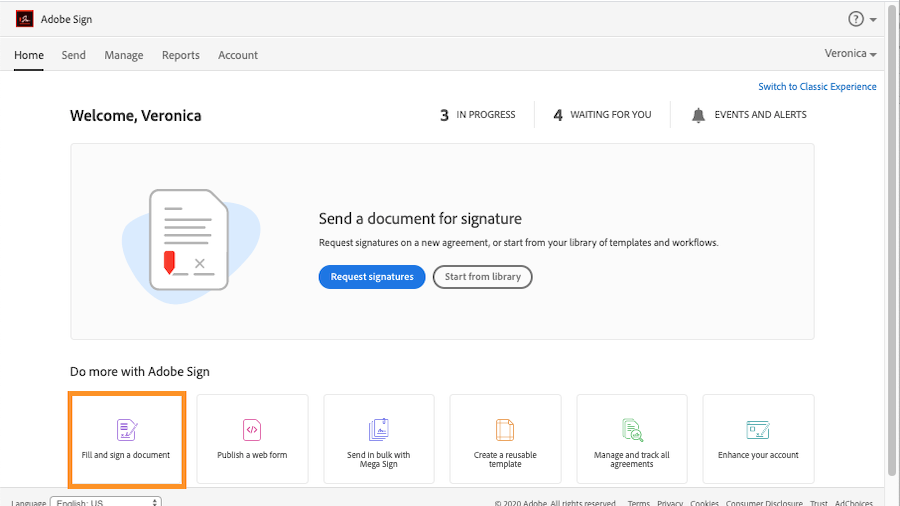
Delegate Someone Else to Sign a DocumentManage and Track Agreements Sent for SignatureHow to manage and track your Adobe Sign agreements in the classic Manage page: How to manage and track agreements your Adobe Sign agreements on the new manage page: Fill and Sign a Document YourselfLearn how to fill in forms and add your signature to the documents you need to sign yourself.
Download the Global Corp Supplier Agreement.pdf practice file and open it in Adobe Sign, or open your own fillable form. You can also add other documents, but in this tutorial, you will work with just one document. You can open a file in two ways:
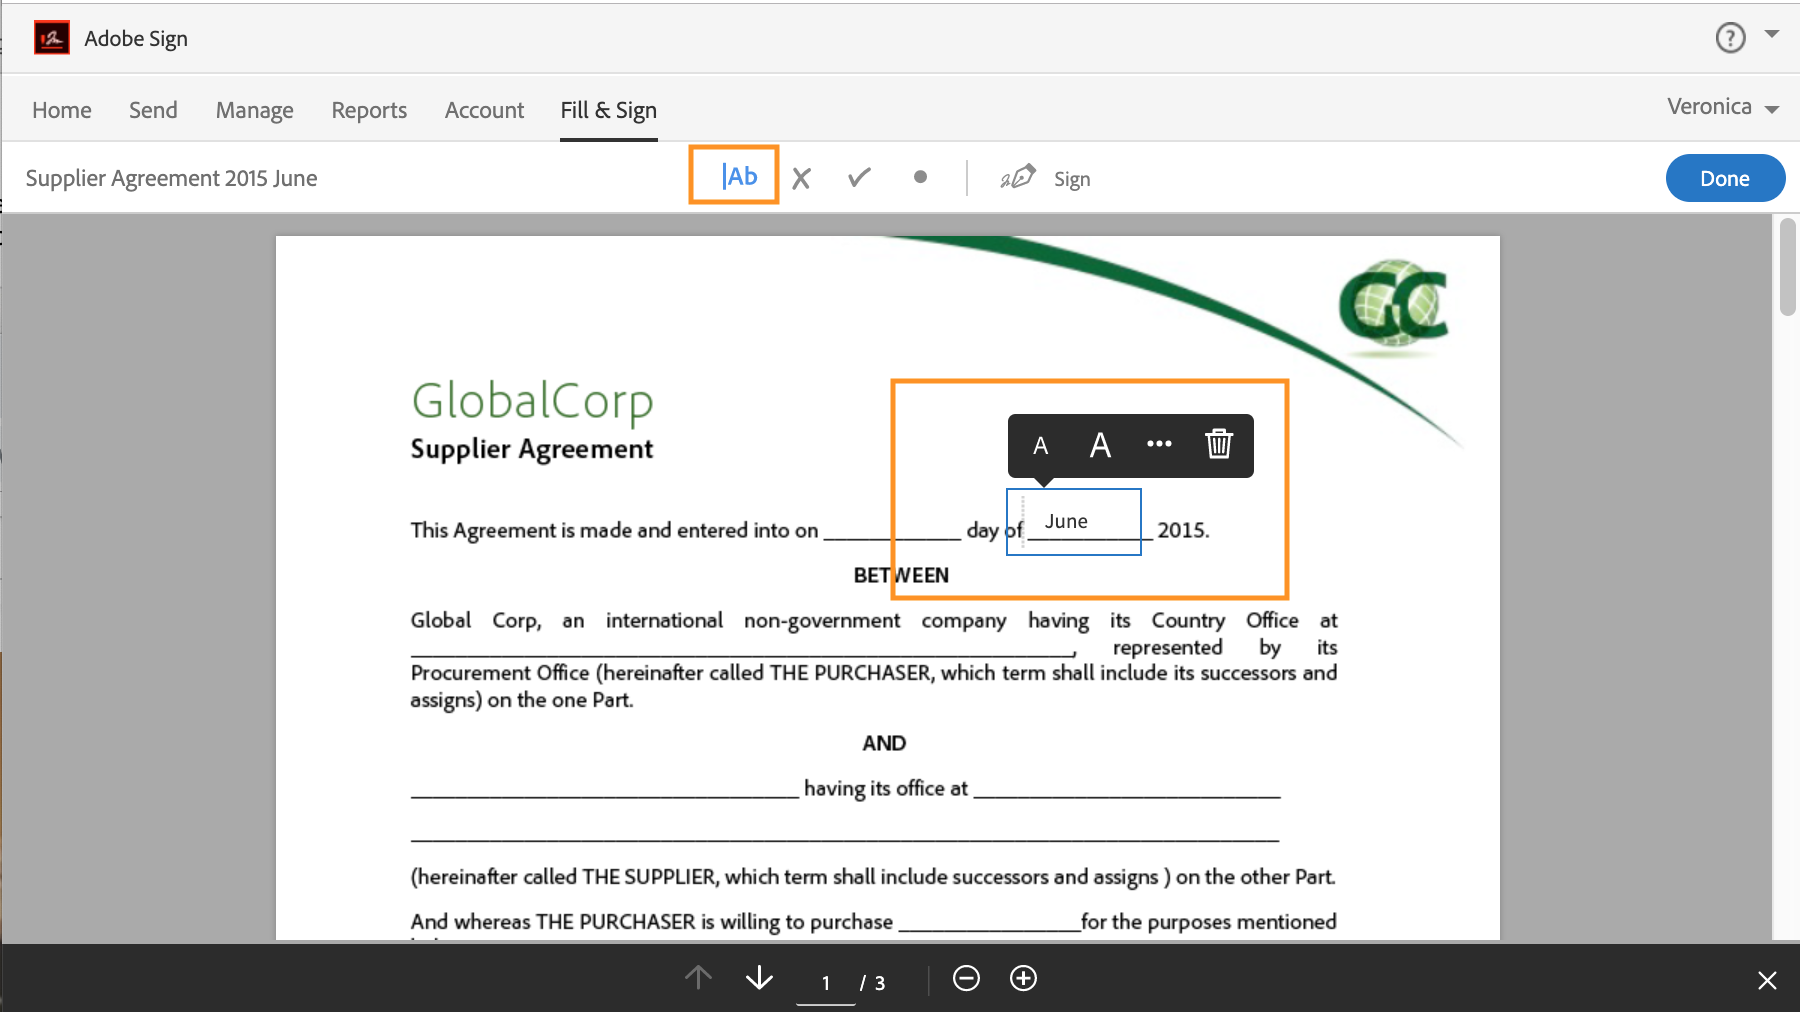
Using the text tool, click anywhere in the document where you want to add text and start typing. You can also use the X, checkmark, and dot tools to add symbols as needed.
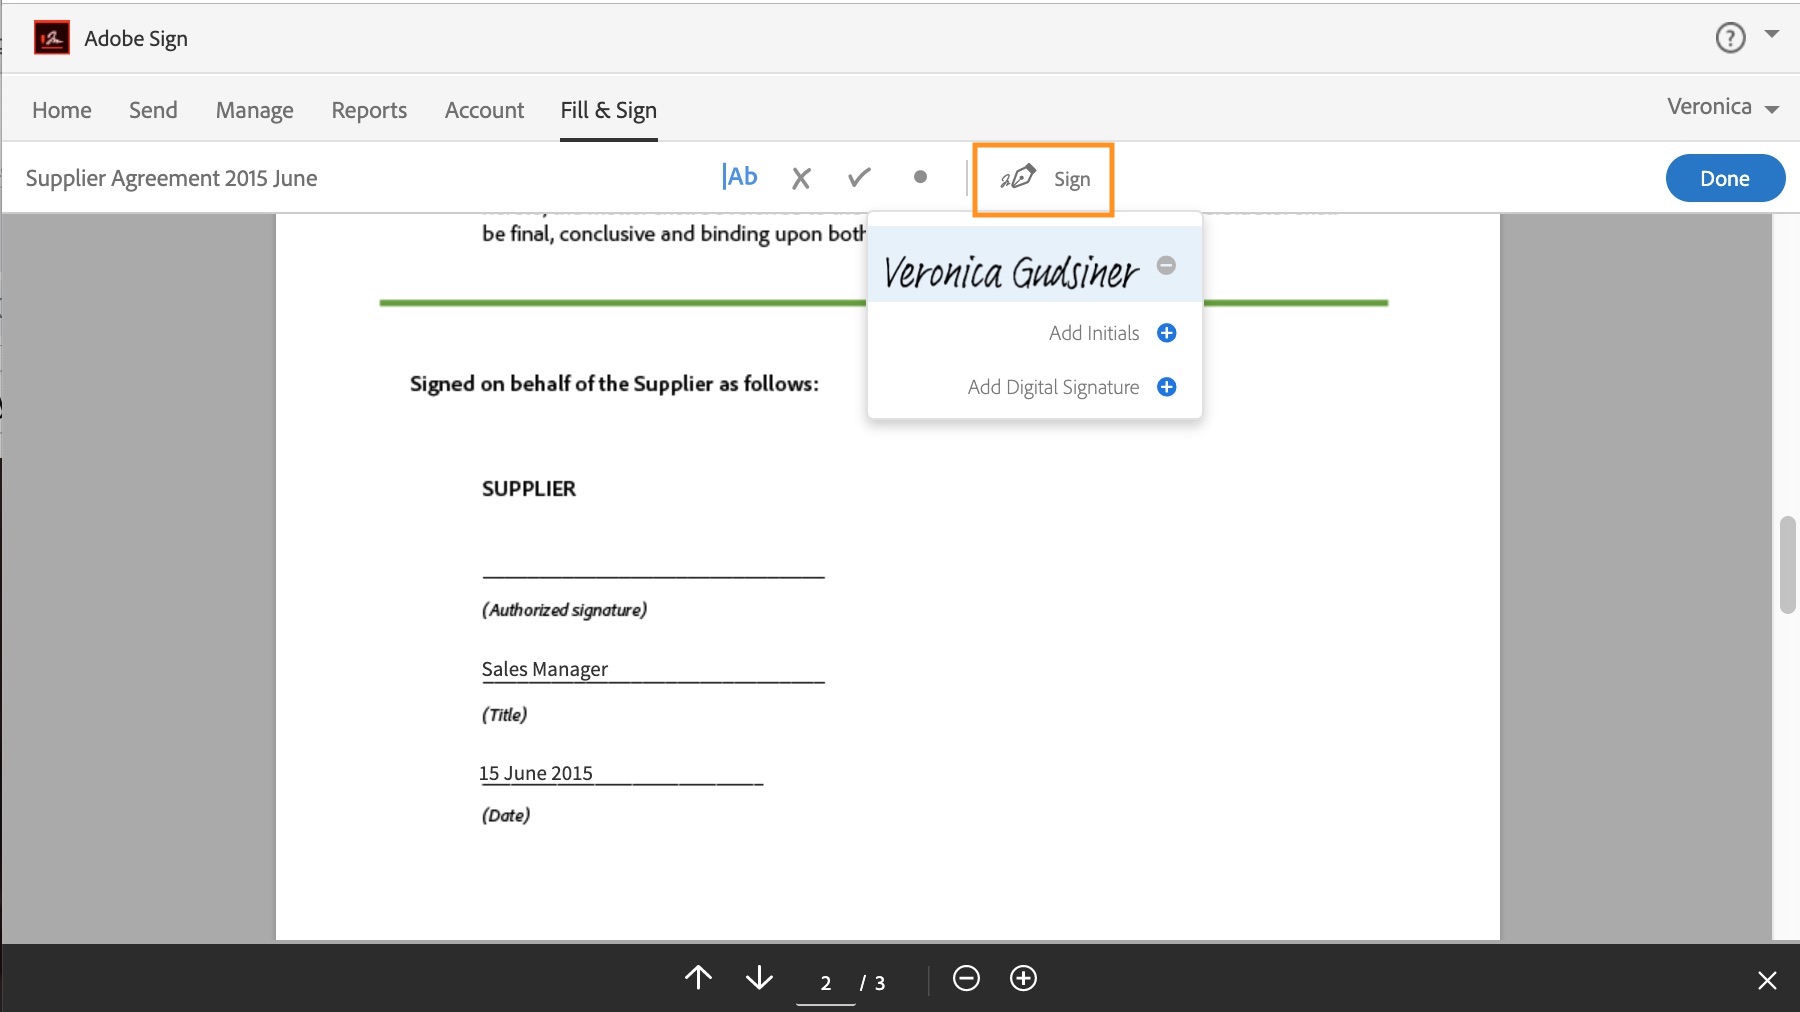
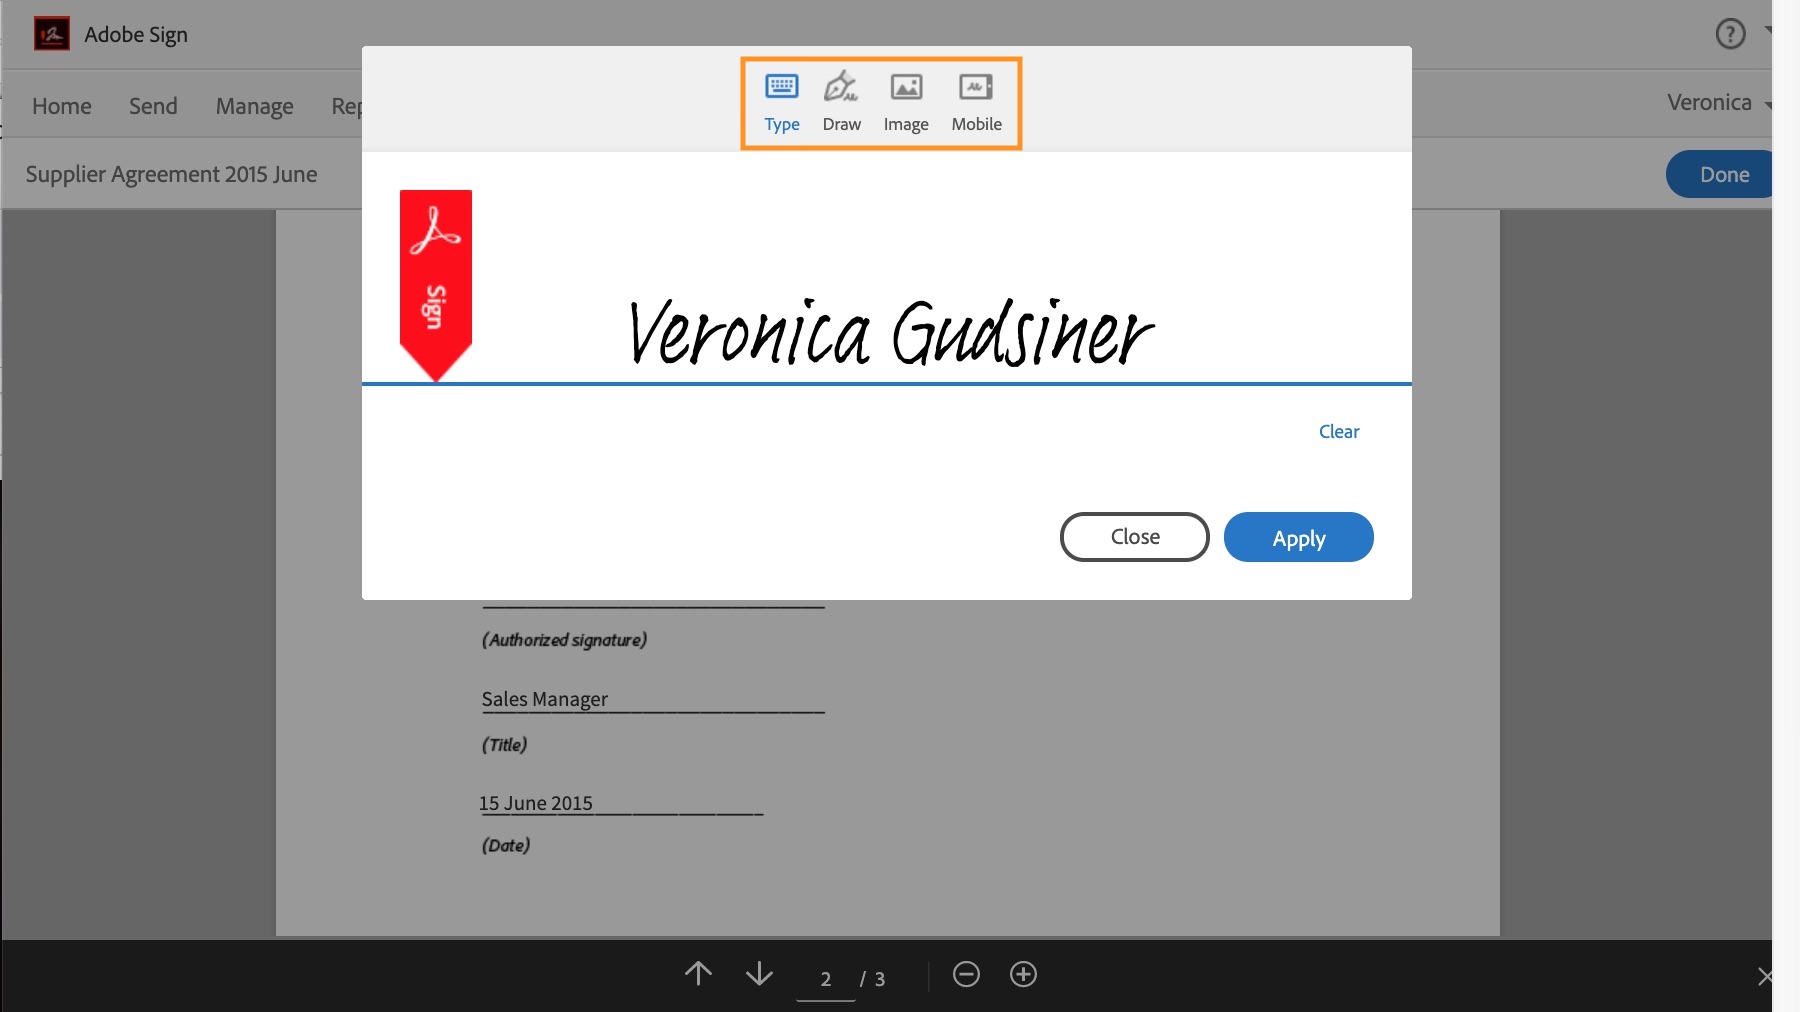
To sign PDF documents or other agreements, follow these steps:
If desired, you can take four optional next steps:
This article was:
Article ID: 650
Last updated: 22 Dec, 2020
Revision: 1
Access:
Public
Views: 5997
|


