Windows users: The uninstall and install instructions below apply to those using
Terminal Sessions to connect from one
Windows computer to another.
MacOS users and others using the HTML5 Access Sessions can jump to those instructions.
These instructions are valid on or after January 10, 2025.
This article covers:
- Uninstalling the previous client (for Windows users)
- Installing the new client components (for Windows users)
- Creating a Terminal Sessions bookmark (for Windows users)
- Launching a session from a Windows PC
- Launching a session for MacOS users and others using the HTML5 Access Sessions
- Creating an HTML5 Access Session bookmark
- Troubleshooting
Windows users
Windows users connecting to an on-campus device using a Terminal Session must upgrade their Pulse Connect Secure client. The upgrade process involves two steps:
- Uninstalling the previous client.
- Installing the new client components.
These instructions must be followed on the device you use to connect from off-campus (e.g. laptop, at-home computer). The sections below outline the steps necessary to complete the upgrade process.
- Download the Pulse Connect Secure client uninstaller by clicking the link below.
PCSUninstaller.exe
- Double-click the downloaded executable to run it. If you can't locate the downloaded file, more information is available here.
- Once complete, click OK to close the uninstaller as shown below.
.png)
- Navigate to the VPN by clicking the link below.
https://ecsu-vpn.easternct.edu
-
If prompted, log in using your Eastern username and password and authenticate with MFA (multi-factor authentication). This new VPN instance is configured to use SSO (single-sign-on), so if you are already logged in to O365 on the browser, you may not be prompted to log in. This is an expected behavior.
.png)
-
Once logged in, Windows users, if you already have a User Created bookmark for your Eastern onsite computer (A), click your Terminal Sessions bookmark to initiate the one-time installation of a new VPN client.
.png)
- Click the Download button at the page shown below.
.png)
Note: if a Look for an app in the Microsoft Store message window appears, ignore this message and hit the ESC key on your keyboard to clear window.
.png)
- Double-click the downloaded executable PulseSecureAppLauncher.msi and click OK once complete.
.png)
- Return to the previous VPN page and follow the displayed instructions by clicking the HERE link highlighted below.
.png)
- If prompted, check the box beside Always allow... and click Open.
.png)
- If prompted, click Always as shown below.
.png)
- Additional components will be automatically downloaded and installed.
.png)
- Once complete, you will automatically be connected to your on-campus Windows computer.
- If you do not have an existing bookmark, (B) create a Terminal Sessions bookmark by clicking the + sign in the upper right corner of the Terminal Sessions box.
.png)
- In the resulting pop-out:
- Enter a Bookmark name. e.g. Office PC
- Enter the computer name. Refer to Article 709: How to Locate Your Computer Name on a Windows Computer if you need to identify a computer name. If needed, you may contact the Eastern Helpdesk for assistance.
- In the auto-populated Authentication section, add easternct\ before the username. e.g. easternct\username.
- Click Save.
.png)
- Navigate to the VPN by clicking the link below.
https://ecsu-vpn.easternct.edu
-
If prompted, log in using your Eastern username and password and authenticate with MFA (multi-factor authentication). This new VPN instance is configured to use SSO (single-sign-on), so if you are already logged in to O365 on the browser, you may not be prompted to log in. This is an expected behavior.
.png)
-
Once logged in, Windows users, if you already have a User Created bookmark for your Eastern onsite computer (A) click your Terminal Sessions bookmark to launch a session.
If you need to create a terminal Session bookmark click here.
.png)
-
You will be connected to your on-campus Windows computer.
Launching a session for MacOS users and others using the HTML5 Access Sessions
MacOS users and others using the HTML5 Access Sessions, need not install any client.
- Navigate to the VPN by clicking the link below.
https://ecsu-vpn.easternct.edu
-
If prompted, log in using your Eastern username and password and authenticate with MFA (multi-factor authentication). This new VPN instance is configured to use SSO (single-sign-on), so if you are already logged in to O365 on the browser, you may not be prompted to log in. This is an expected behavior.
.png)
-
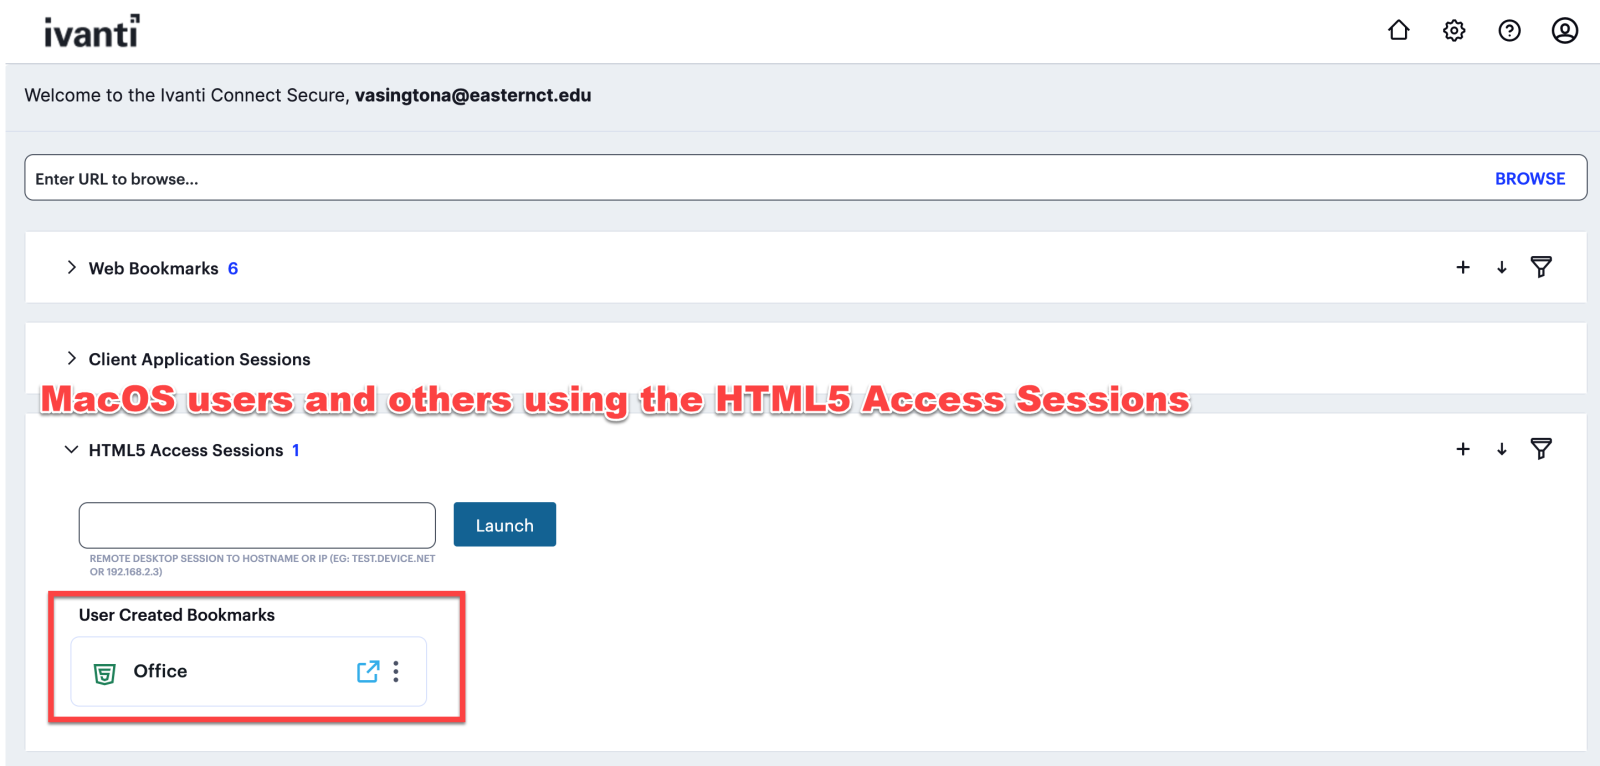
Once logged in, MAC users, click the bookmark under the User Created bookmarks for your Eastern onsite computer.
If you need to create an HTML5 Access Session bookmark, click here.

-
You will be connected to your on-campus Windows computer.
-
Click the + sign in the upper right corner of the HTML5 Access Sessions box.
.png)
-
In the resulting pop-out:
- Enter a Bookmark name. e.g. Office
- Enter the computer name. Refer to Article 709: How to Locate Your Computer Name on a Windows Computer if you need to identify a computer name. If needed, you may contact the Eastern Helpdesk for assistance.
- Click Save.

- Fonts appear fuzzy, or otherwise malformed
1. Click the Item Properties button beside your Terminal Sessions bookmark, circled below.
.png)
2. Scroll down to the bottom and check the Font Smoothing box under Display Settings
.png)
3. Click Save Changes
.png)
4. If your VPN remote control session is still running, close it and relaunch it to apply the font changes.
.png)
.png)
.png)
.png)
.png)
.png)
.png)
.png)
.png)
.png)
.png)
.png)

.png)

.png)
.png)
