You can find Panopto's web-based recording solution in the following article: Recording with Panopto Capture - A Web-based Recording Application
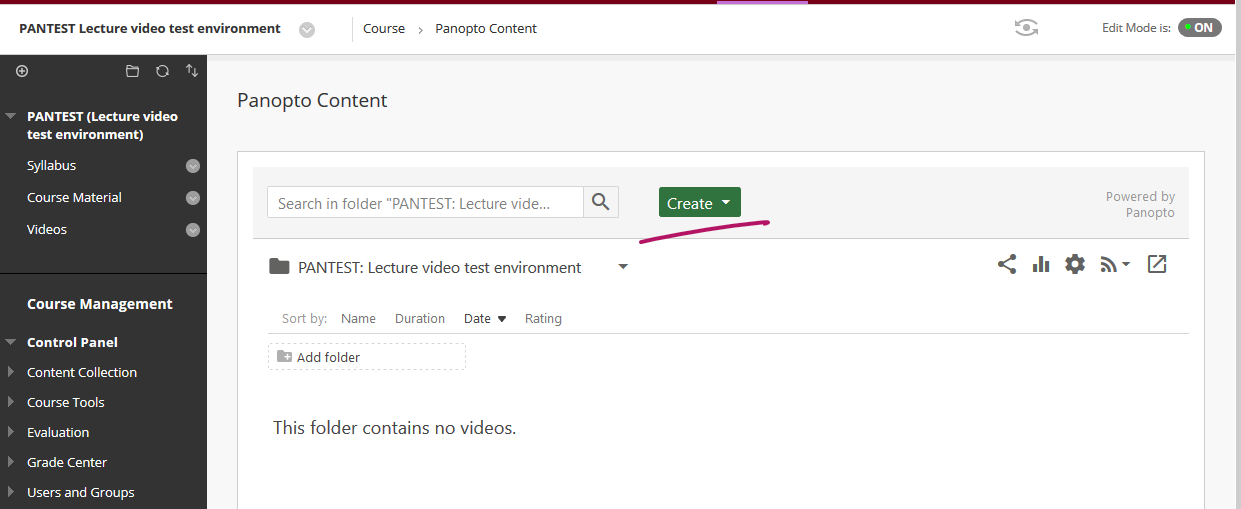
- Once Panopto is installed, you should access it from your Blackboard course by clicking on the Tool Link you created (Videos)
Note: The browser you use will have an impact the experience and it may look slightly different from the screenshots below.
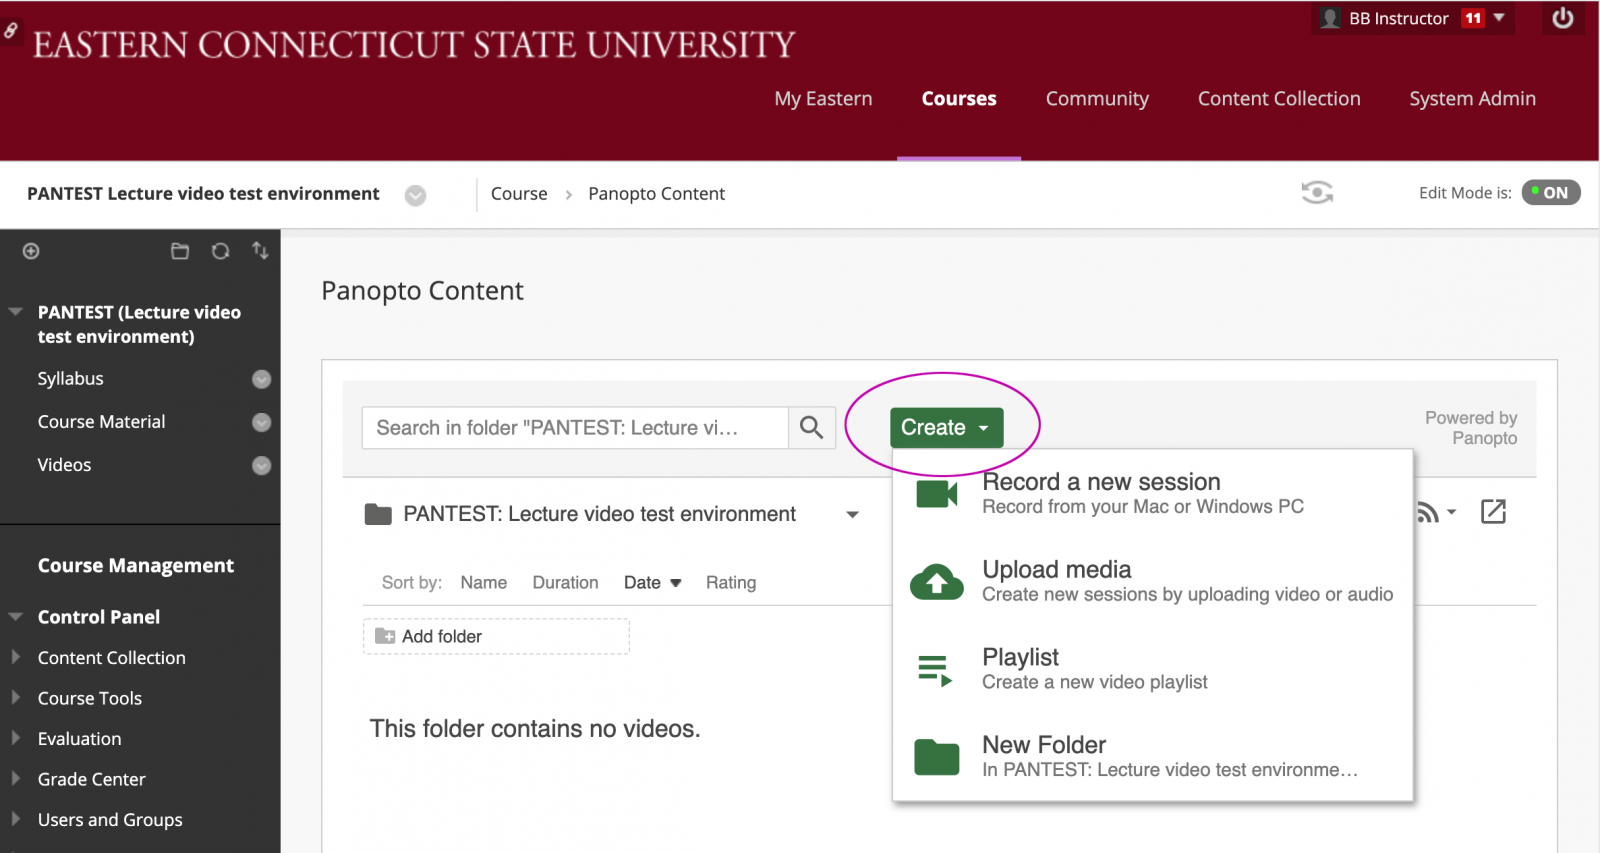
- Click on the Create button.
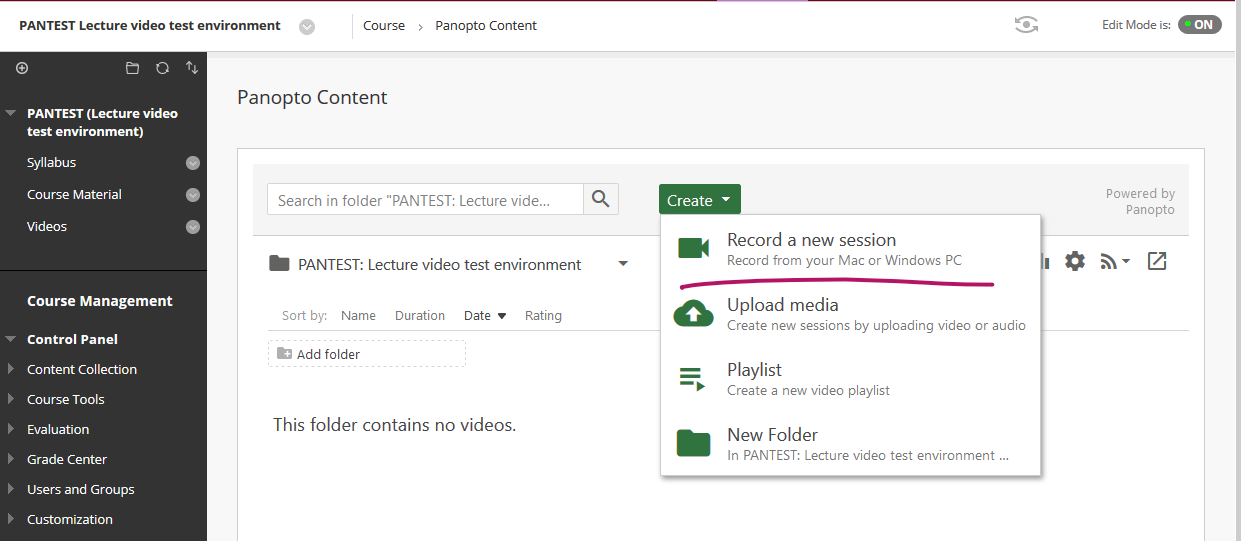
- Then choose Record a New Session and Open Panopto
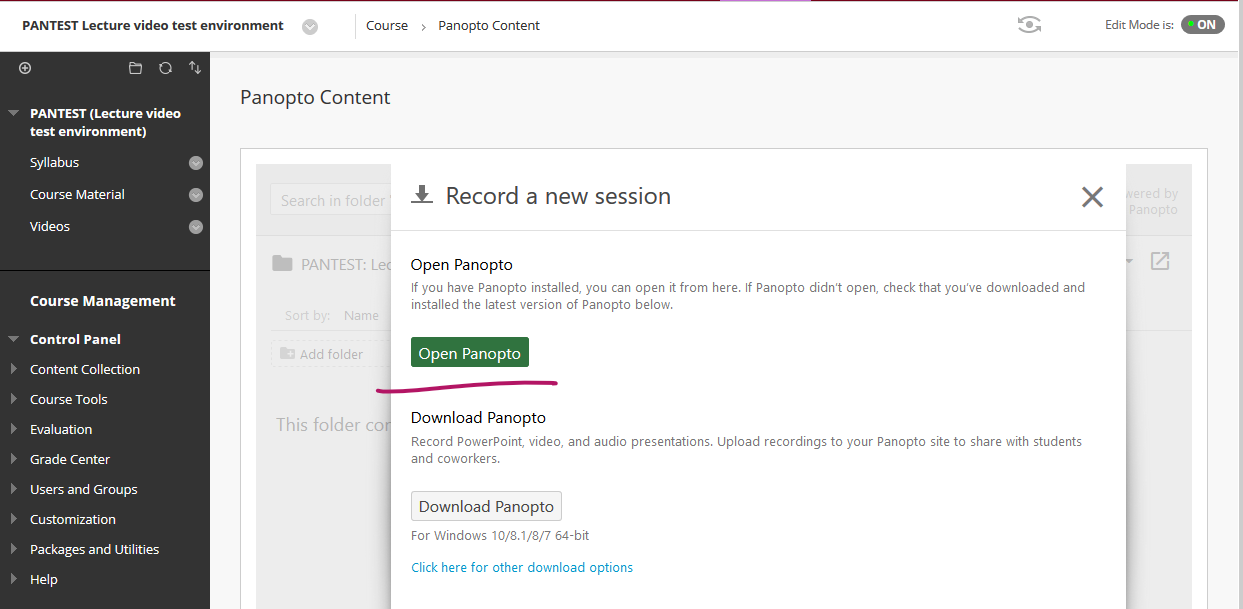
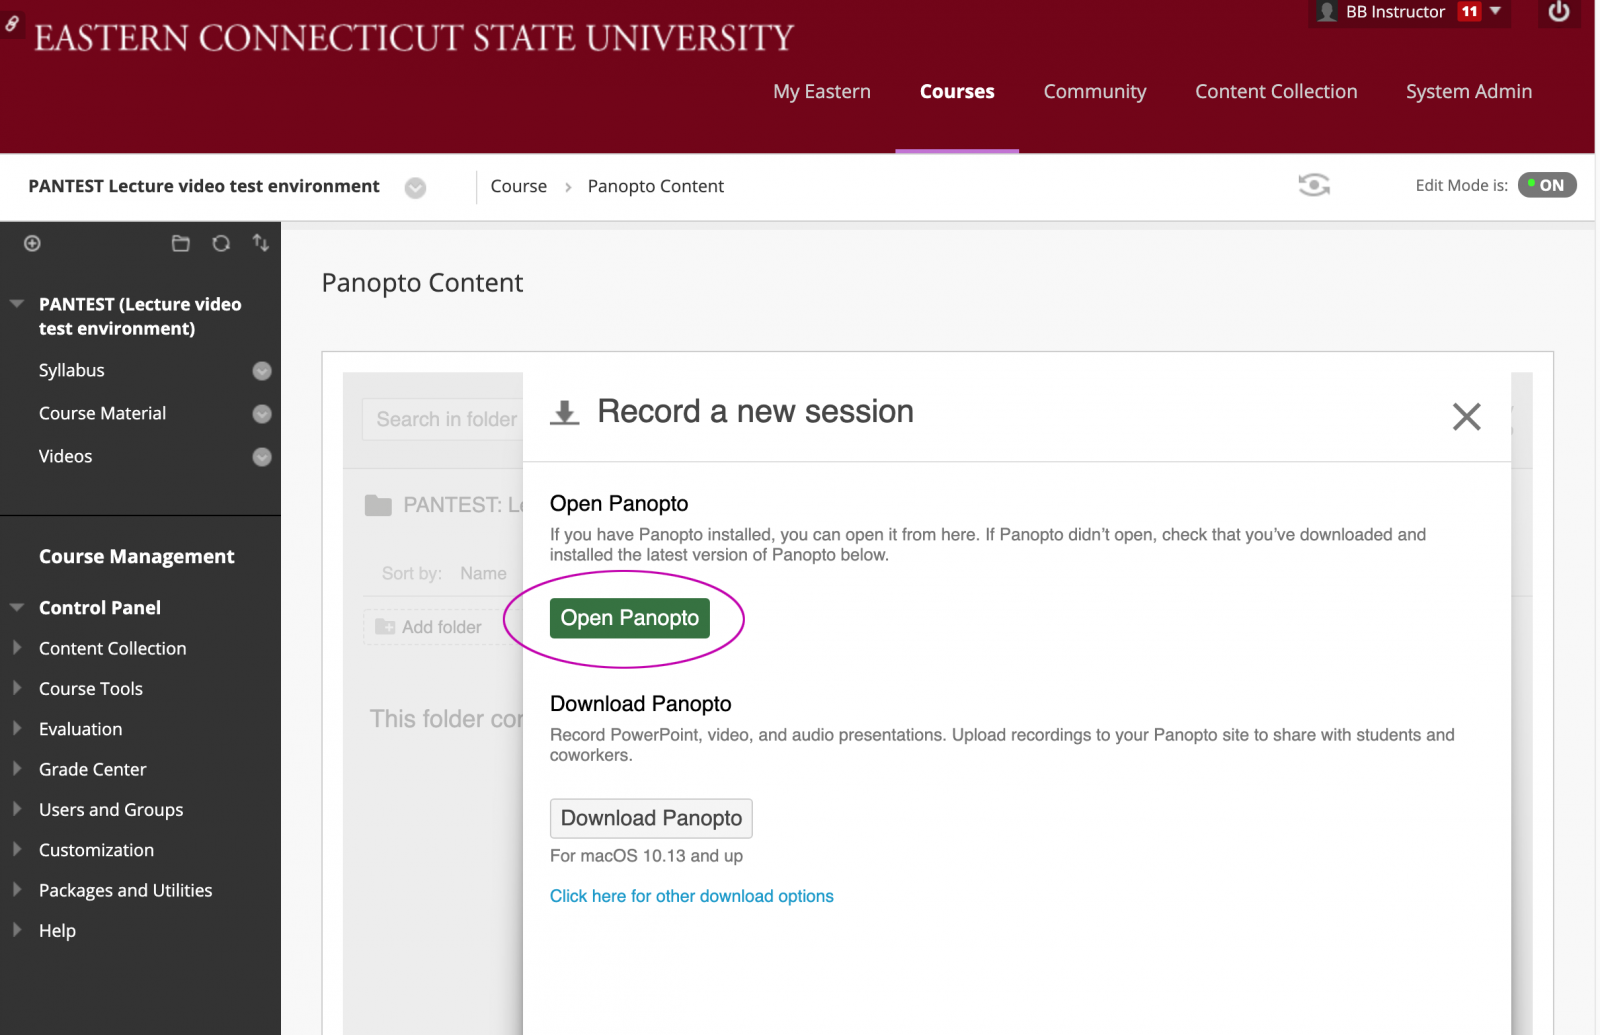
- If you have the Panopto software installed, keep following these instructions. If you need to install the software, please refer to Article 524: Installing Panopto
- Click Open Panopto.
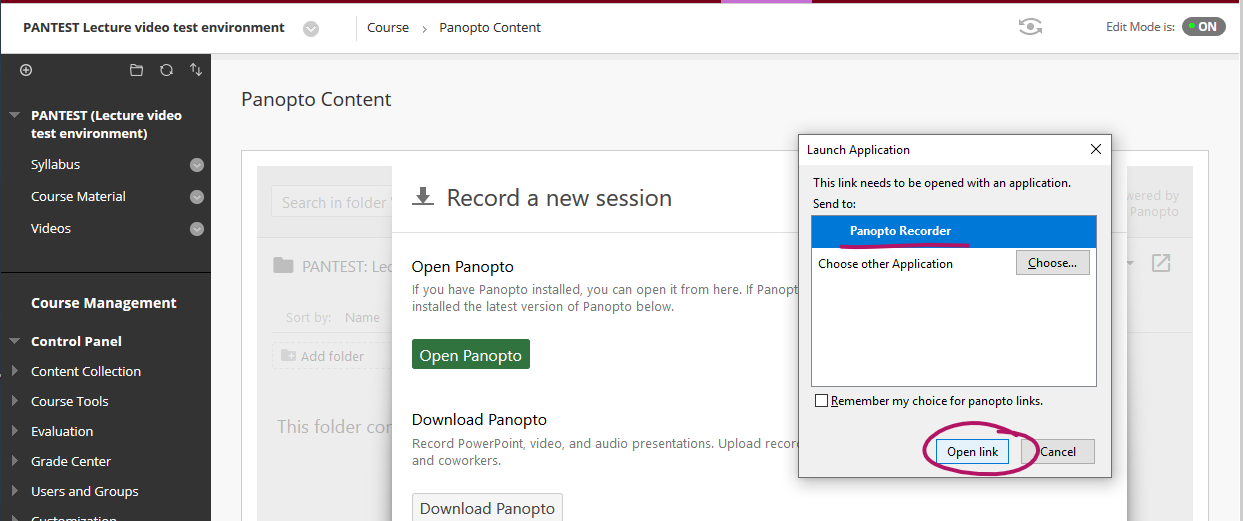
- A Launch Application may present itself, select Panopto Recorder as the application and click Open link.
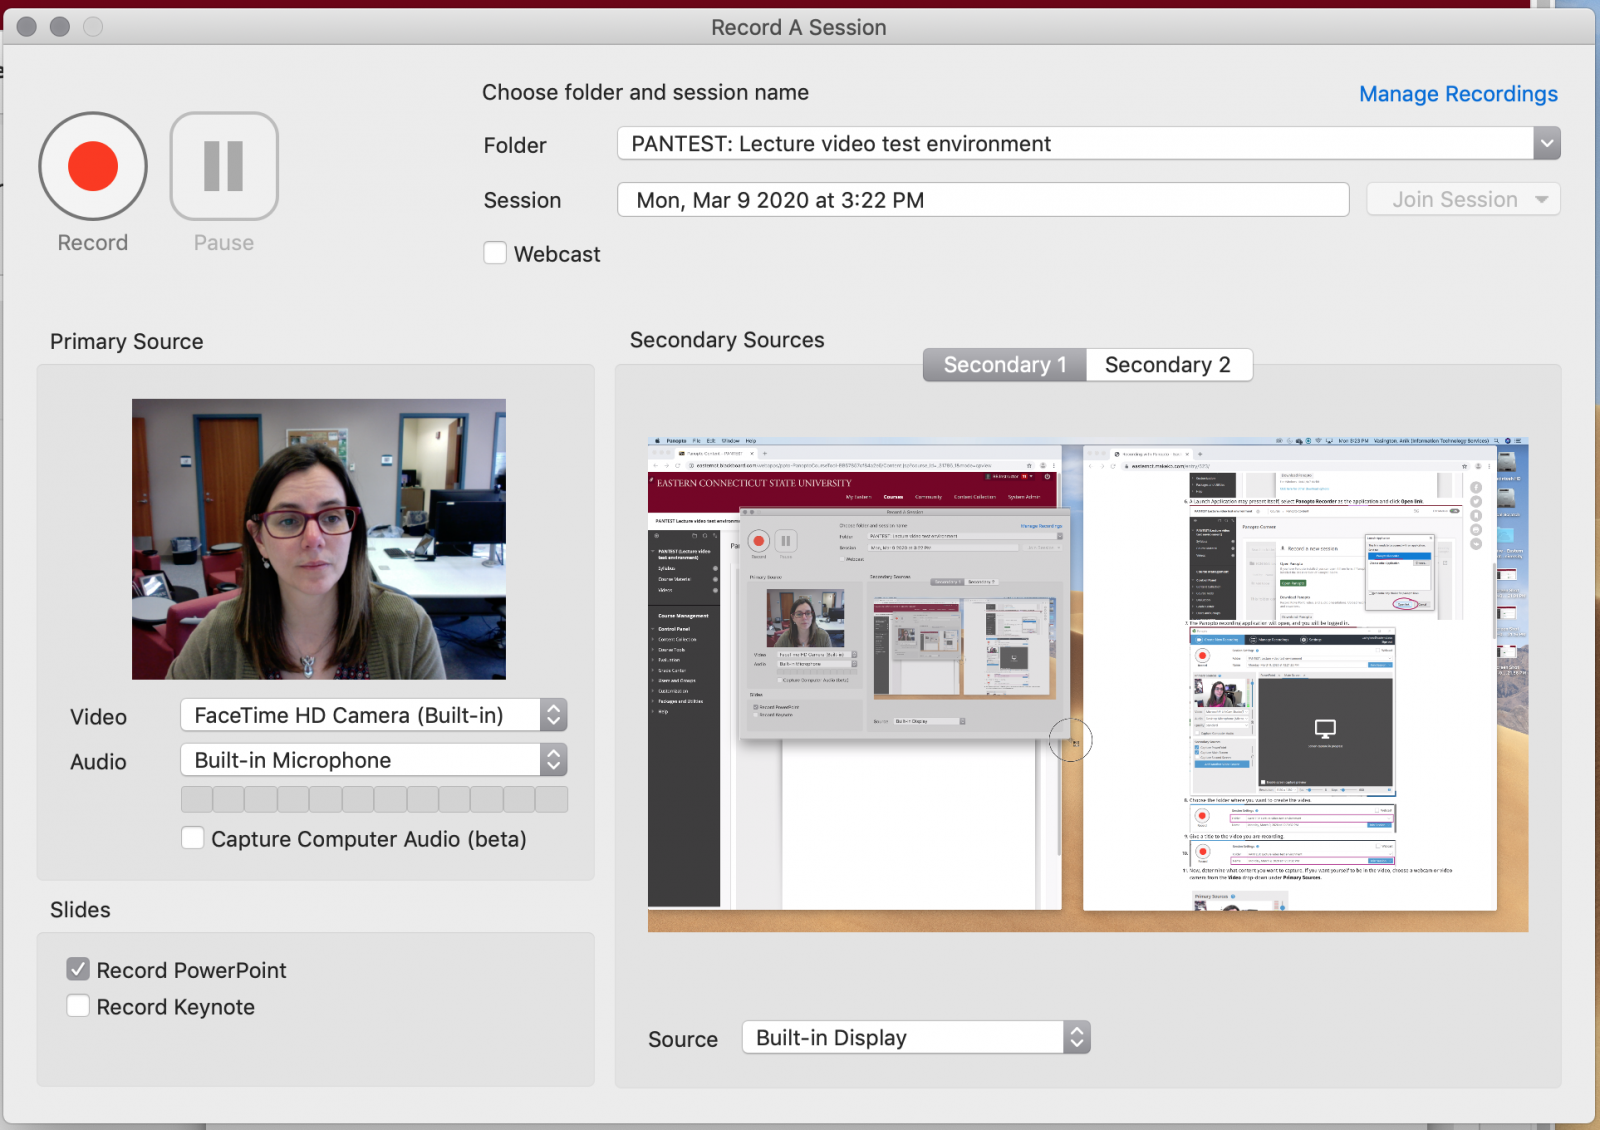
- The Panopto recording application will open, and you will be logged in.
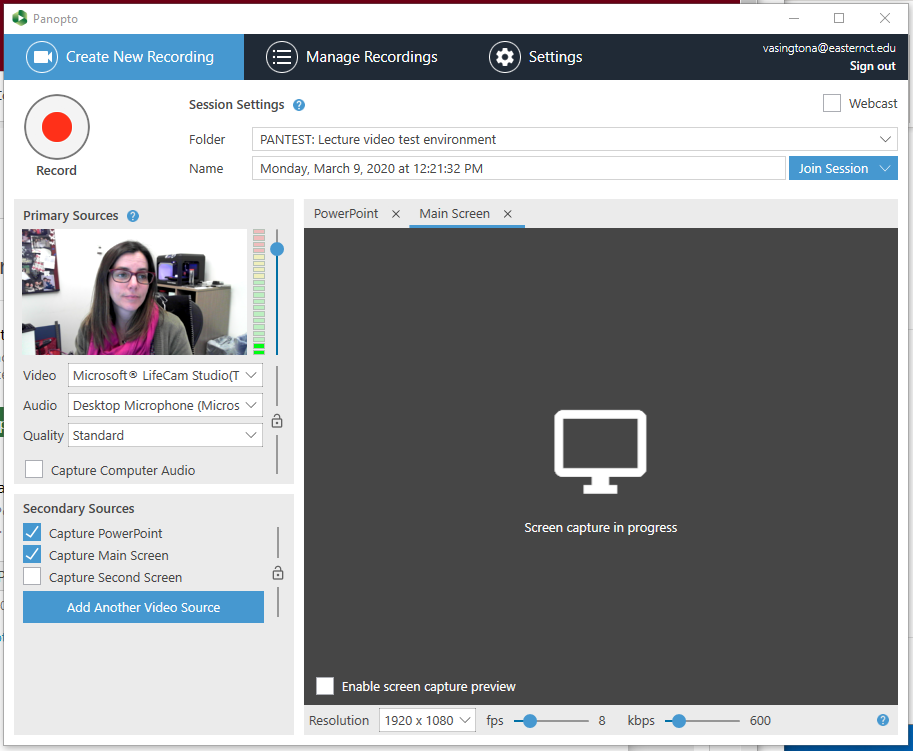
- Choose the folder where you want to create the video.

- Give a title to the video you are recording.

- Now, determine what content you want to capture. If you want yourself to be in the video, choose a webcam or video camera from the Video drop-down under Primary Sources.
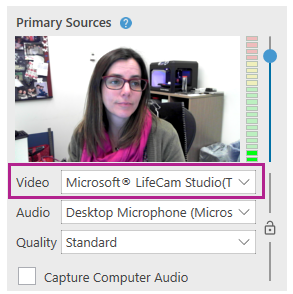
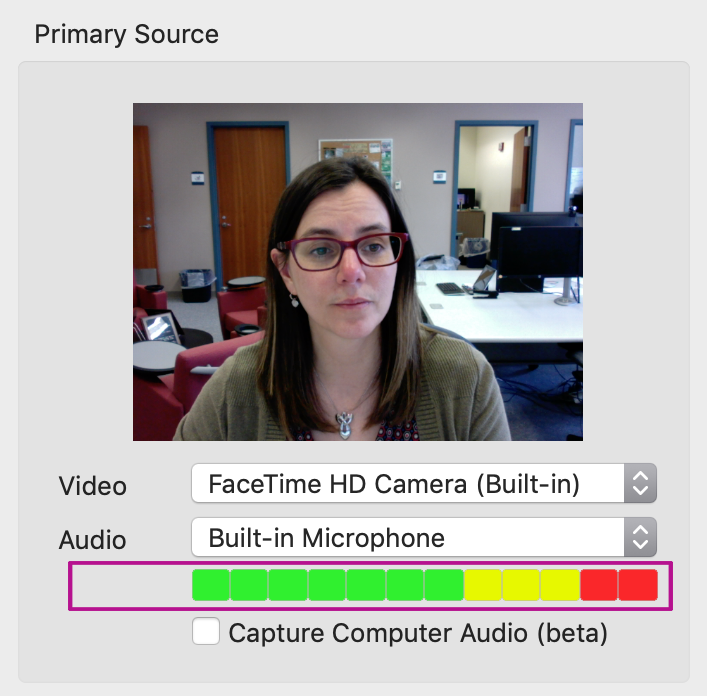
- Choose your Audio under Primary Sources by selecting a microphone that is connected to your computer (Fig. 8). Note: You must select a primary audio source for a successful recording.
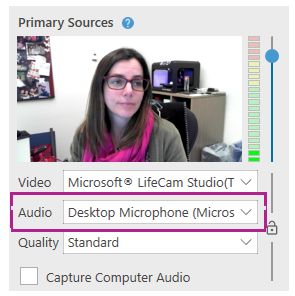
- After selecting, test your audio by talking in a normal voice to test volume. You should see a few green bars appear as you talk. If you don't see any or see the red and yellow bars highlighted, adjust the volume by using the slider.

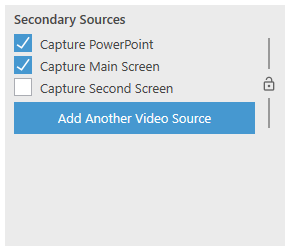
- If you want to record your screen, PowerPoint slides or additional cameras, choose from the options under Secondary Sources. If you want to capture a PowerPoint, you should open that file and prepare to display it before you hit record.
- If you will be moving quickly around your screen, adjust the fps setting at the bottom of the screen up to 15. If you will be capturing video playing on your screen, adjust this setting to 30. Note: fps means Frames Per Second, and the setting controls how many pictures per second Panopto is taking of your secondary sources. A higher setting will allow motion to be smoother in the video.

- If you want to capture your computer's audio, click the checkbox Capture Computer Audio.
.png)
- When you're ready, click the Record button at the top. Panopto will start recording all of the sources you've selected. If you've chosen to record your screen, you can minimize Panopto and begin displaying the content you wish to present.

- When you are finished, maximize Panopto and click the Stop button.

- Click the blue Upload button, and your video will automatically be uploaded to your video library.

There are a few differences when recording a video in Panopto on a Mac.
- Once Panopto is installed, you should access it from your Blackboard course by clicking on the Tool Link you created (Videos)
Note: The browser you use will have an impact the experience and it may look slightly different from the screenshots below.
- Click on the Create button.
- Then choose Record a New Session and Open Panopto

- If you have the Panopto software installed, keep following these instructions. If you need to install the software, please refer to Article 524: Installing Panopto
- Click Open Panopto.
- A Launch Application may present itself, select Panopto Recorder as the application and click Open link.
- The Panopto recording application will open, and you will be logged in.
- Choose the folder where you want to create the video.

- Give a title to the video you are recording.

- Now, determine what content you want to capture. If you want yourself to be in the video, choose a webcam or video camera from the Video drop-down under Primary Sources.
- Choose your Audio under Primary Sources by selecting a microphone that is connected to your computer (Fig. 8). Note: You must select a primary audio source for a successful recording.
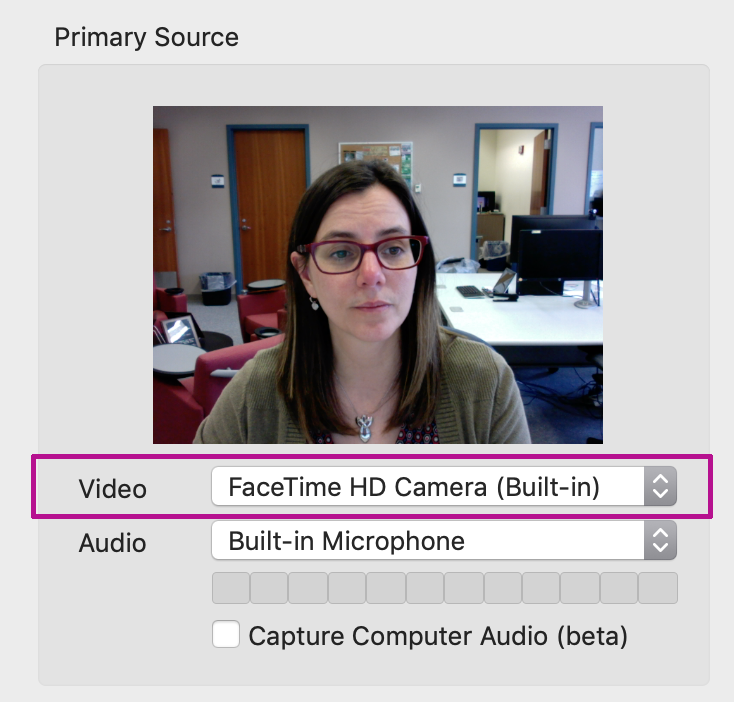
- After selecting, test your audio by talking in a normal voice to test volume. You should see a few green bars appear as you talk. If you don't see any or see the red and yellow bars highlighted, adjust the volume by using the slider.
- a) If you want to record your screen, additional cameras, choose from the options under Secondary Sources. You can select two secondary video sources. Select the Secondary 1 or 2 tabs at the top then select the desired secondary video Source from the source drop down list. This is where you select your desktop display for screen capture or additional cameras.
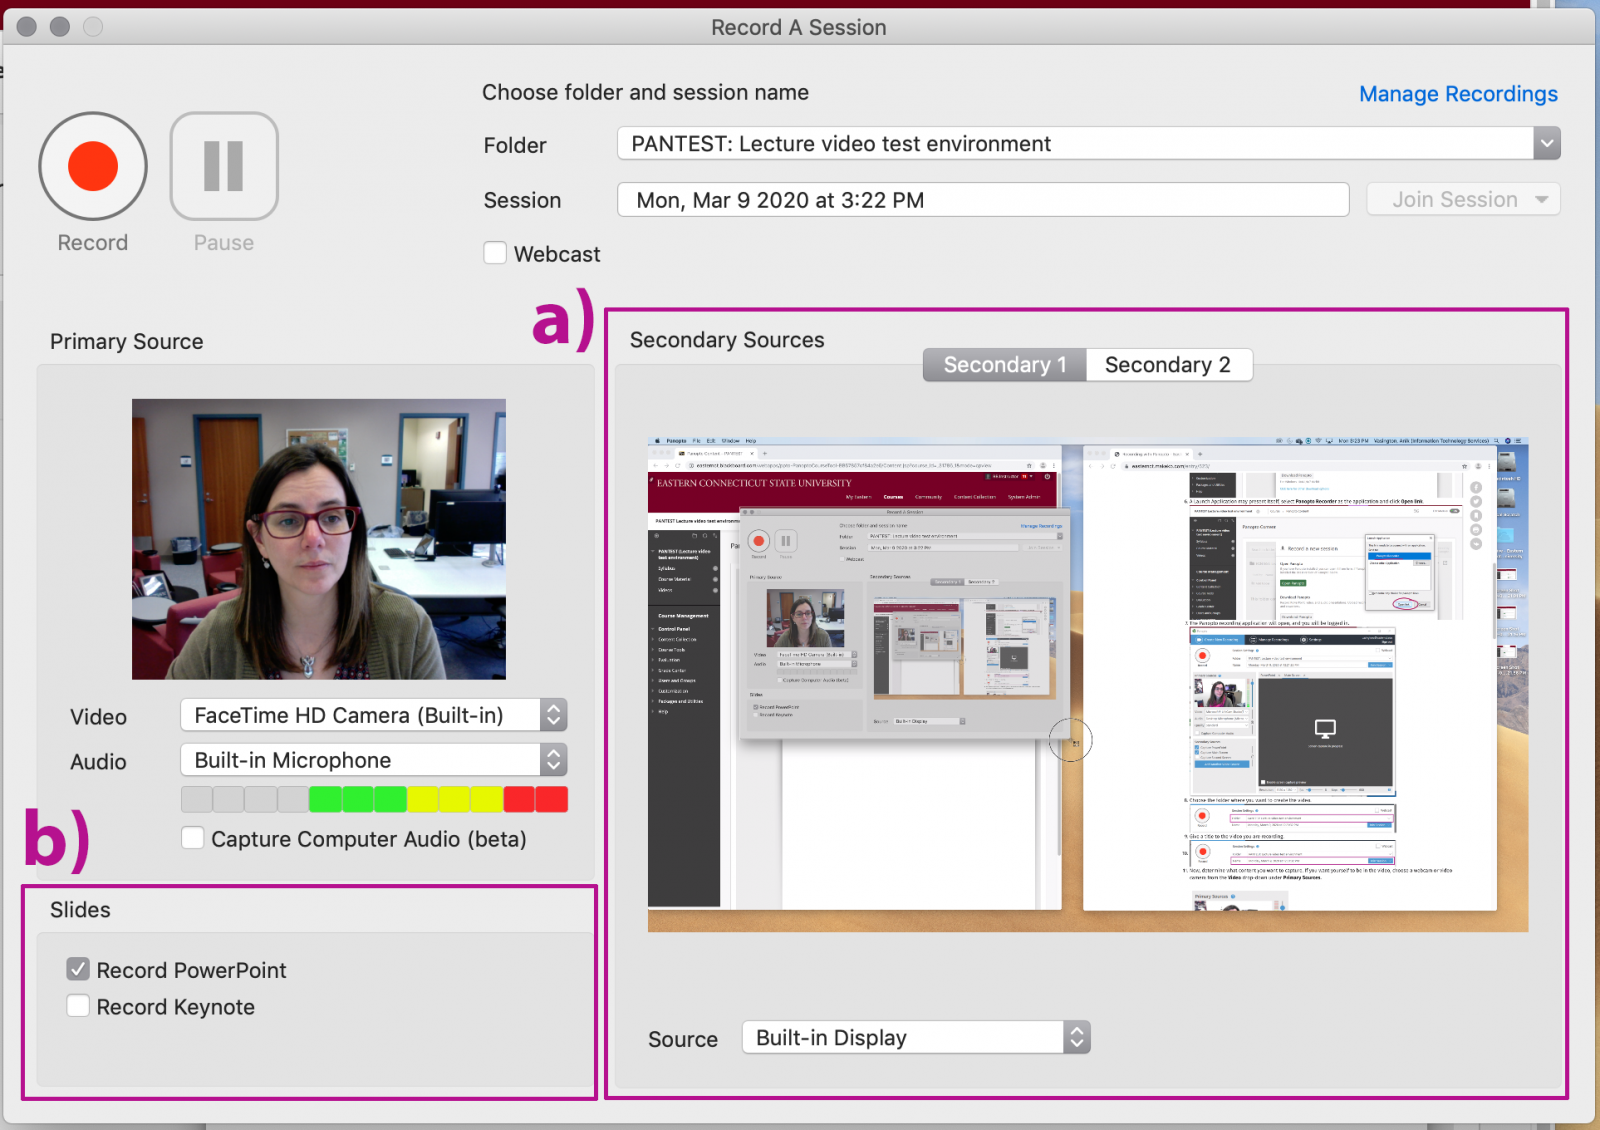
b) If you want to capture a PowerPoint or Keynote, choose from the Slides Sources. You should open that file and prepare to display it before you hit record.
- When you're ready, click the Record button at the top. Panopto will start recording all of the sources you've selected. If you've chosen to record your screen, you can minimize Panopto and begin displaying the content you wish to present.
- When you are finished, maximize Panopto and click the Stop button.
Click the blue Upload button, and your video will automatically be uploaded to your video library.
The following link contains instructions for using the Panopto App on iOS devices.
- https://support.panopto.com/s/article/ipad-app-0
